It is important to prioritize security always when deploying your application, especially if your application retains client data.
When building Django applications, you need to take some steps and make some changes to the application setup before deploying.
In this tutorial, I will take you through the steps you should follow to ensure your application is more secure when deploying. Some of these steps will be specific to just deploying to Heroku. But even if you aren’t using Heroku, you will be able to adapt the tips given here.
Heroku is basically a platform-as-a-service (PaaS) where you can deploy, manage, and scale modern apps. They support several programming languages, including Python, the language upon which Django is based. Heroku makes deployment using git really easy, so that is what we will be using in this tutorial.
For your convenience, the code will be available on a git repository.
Prerequisites
- Basic knowledge of Django
- Basic Knowledge of Git
Setting Up Django
This tutorial is going to lay down the steps for a basic “Hello World” Django application. This will be sufficient to provide you with a rundown of the build process.
First of all, install Django if you haven’t—$ pip install django.
Create a folder for your project. On your terminal, navigate to the directory you just created and run $ django-admin startproject Hello.
You’ll see that the Django base files have been created.
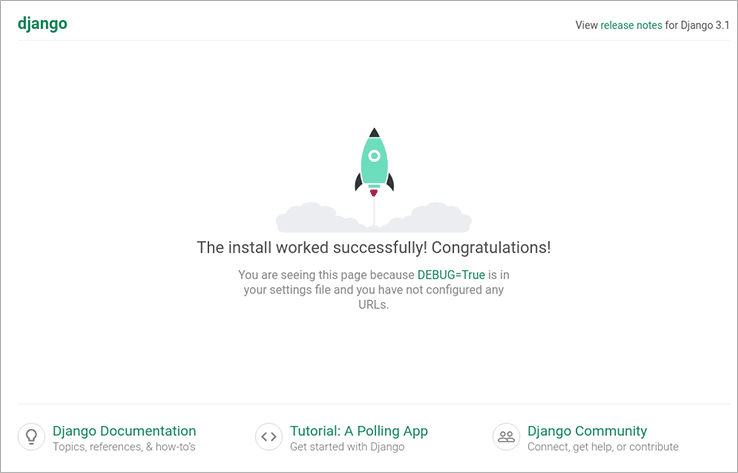
Next, running $ python manage.py runserver should run your server on http://127.0.0.1:8000/ and show you this:
Create views.py in the folder where settings.py is and put the code below to display “Hello world!” on the homepage.
Then, open your urls.py file and update it to look like this:
Preparing Your Application for Deployment
First, you have to create a Procfile. This file must be in the same directory manage.py is in. The following code will be contained in that file.
In case you are working on another project, Hello.wsgi is the path to my wsgi file. Replace that with the path to your wsgi file.
Now create the requirement.txt file and put the following dependencies: Django & gunicorn.
Next, we have to tell Heroku the version of Python on which our application should run. We will do that in a runtime.txt file. Make sure to check which Python versions are supported by Heroku first. After creating the file, input the following: python-3.8.11
Setup Heroku
First, install the Heroku CLI.
Log in to your Heroku account and follow the prompts to create a new SSH public key.
Now login to Heroku with:
$ heroku login
Next, initialize a git repository in the root of your project, i.e., where the manage.py file is.
$ git init
Inside the project root, create an app on Heroku:
heroku create hello-security-app
You can replace hello-security-app with whatever you wish to name your application.
To store your code in a remote Git repository in Heroku, run:
$ heroku git:remote -a hello-security-app
Now, go to the Heroku Dashboard, and you will see that your application has been created successfully.
Security Updates
What we have to do now is hide our Django secret key. Attackers can do significant damage if the key is left exposed, so it should always be hidden.
Heroku provides a feature for us to be able to do that.
What you need to do is add import os to the top of your settings.py file and change your secret key SECRET_KEY = xxxxxxxxxxxxxxxx to look like this: SECRET_KEY = os.environ.get(‘SECRET_KEY’)
If you have your database set up or you have any API keys in your settings folder, make sure you turn them into the form above.
E.g API_KEY = os.environ.get(‘API_KEY’)
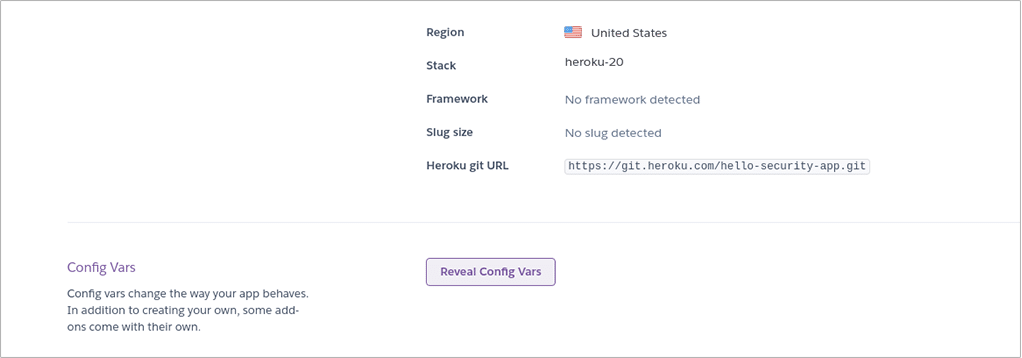
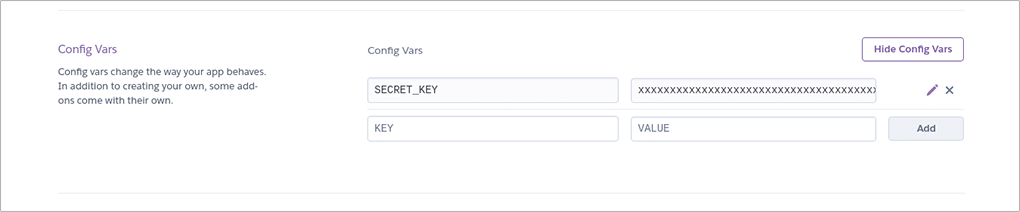
Now, go to the Heroku dashboard and click on the application you just created. Then, go to the “settings” tab. You should see the “Reveal Config Vars” button. Click on it.
In there, you can input your secret key or any API keys you have and click on “Add”. Your keys are protected by Heroku now.
Finally, in your settings.py file, make sure DEBUG = False.
Then add “.herokuapp.com” to allowed host like this:
ALLOWED_HOSTS = [“.herokuapp.com”]
Disable collectstatic for this application by running:
$ heroku config:set DISABLE_COLLECTSTATIC=1 (this is required by Heroku).
Commit and push your code to Heroku.
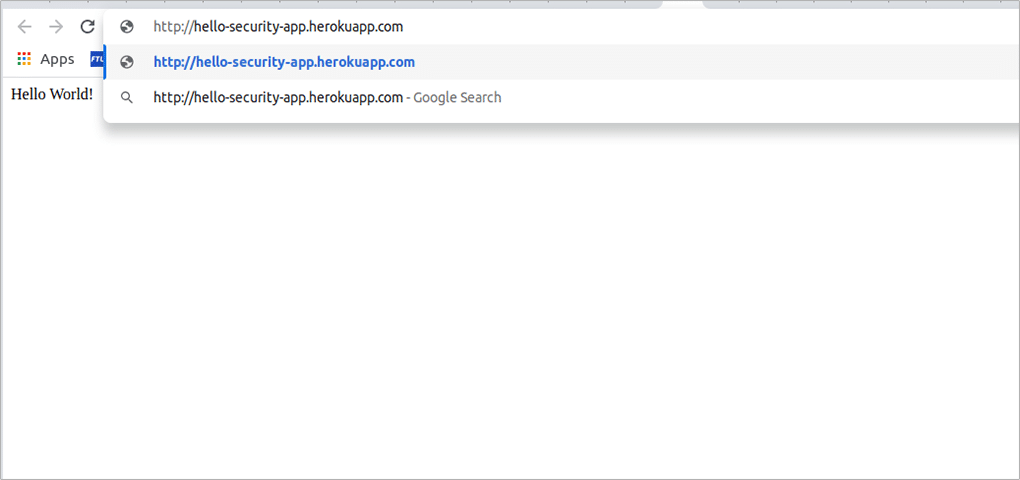
Now, go to your app on the Heroku dashboard and click on the Open App button. You will see your application displayed.
At the moment, our application will open if we remove the ‘s’ in “https://”
That is a security flaw because malicious network users can get or alter information transferred between client and server. This should be fixed.
You are going to make it so that when “http://” is typed, the visitor of the site is redirected to “https://”. To do that, go to the end of your settings.py file and add the code below:
There are Django docs available where you can learn more about this.
Commit and push your changes to Heroku.
Try going to your application with “http://”. It should redirect you to “https://”.
Conclusion
In this article, I have talked about how you can secure your project when deploying it to Heroku.
As mentioned earlier, security should not be overlooked. It will protect your application from being hacked and prevent valuable information from getting into the wrong hands. Therefore, it is advisable that you go through this article and don’t bypass any of the steps.
The goal of this article is to demonstrate how you can securely deploy your application to Heroku with ease. Hopefully, this will be sufficient for you to understand how to implement this security in your own project.